When working with .NET you sometimes need to add reusable external code, or packages, to your project. With .NET and it’s vast ecosystem, there is a handy tool that you can utilize to do that. The tool is NuGet. NuGet is a package manager where you can access these “packages”. In this post we will take a quick look at three different ways to access and install a package to our C# Project from NuGet. The three methods are: dotnet cli tool, Visual Studio Package Manager (GUI) and Visual Studio Package Manager Console.
In all three examples, I will be using a .NET 7 Console Application for each and then I will use the respective method to add a package to the application. The package we will be targeting is StyleCop.Analyzers. Here is a link to it’s repo and here is a link to its page on NuGet. To create a console application from the command line run the following:
PS> dotnet new console -o ConsoleApp
NOTE: The “-o ConsoleApp” is to dump the output in a new directory with the name “ConsoleApp”.
Visual Studio Package Manager Console
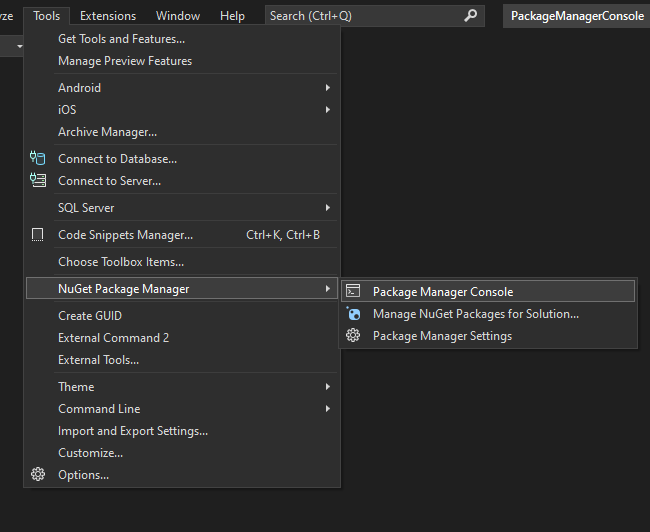
The first method we will use is the Visual Studio Package Manager Console. Open your solution or csproj file in Visual Studio. I am using Visual Studio 2022. Once the project opens, go to Tools > NuGet Package Manager > Package Manager Console (shown below).
The Package Manager Console window will open and pin itself to the bottom of Visual Studio. From here you can use the following command to install the specific package to the project:
PM> Install-Package StyleCop.Analyzers -Version 1.2.0-beta.435
From the command line, I typically always try and specify the version that I am targeting. Once you run the command, there will be a handful of lines of output on the Package Manager Console. If the package installed correctly, at least one of those lines should say “Successfully installed”.

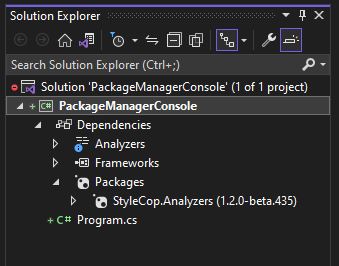
You can verify this by checking Visual Studio’s Solution Explorer. In the Solution Explorer expand your project, then Dependencies and finally Packages. Below, you can see my Solution Explorer with the StyleCop.Analyzers NuGet Package installed.
Visual Studio Package Manager (GUI)
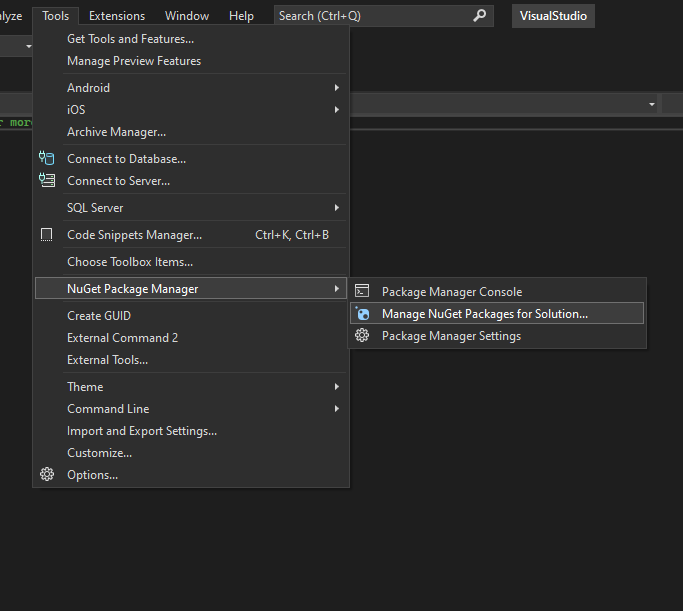
The next method we will look at is the GUI version of the Package Manager in Visual Studio. Again, open your project or solution in Visual Studio. From here we will navigate to Tools > NuGet Package Manager > Manage Packages for Solution.
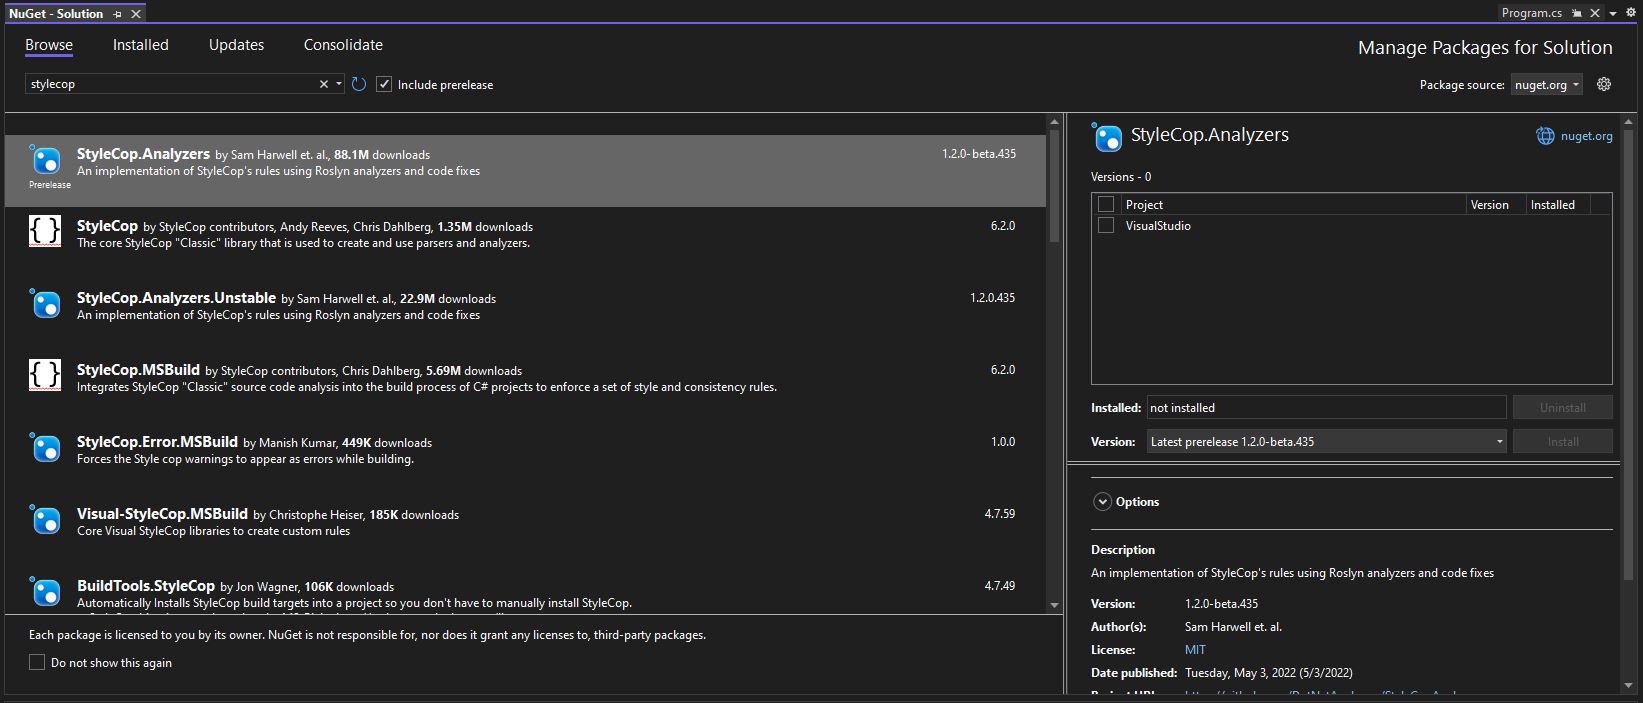
This will open up the Manage Packages for Solution window in the main area of Visual Studio. By default, it will put you in the installed section which is typically blank. Make sure your Package Source is set to nuget.org and navigate to the Browse Tab. From here you can search for the package you are looking for. Once you find it, check the project you want to install the package to and click the Install button.
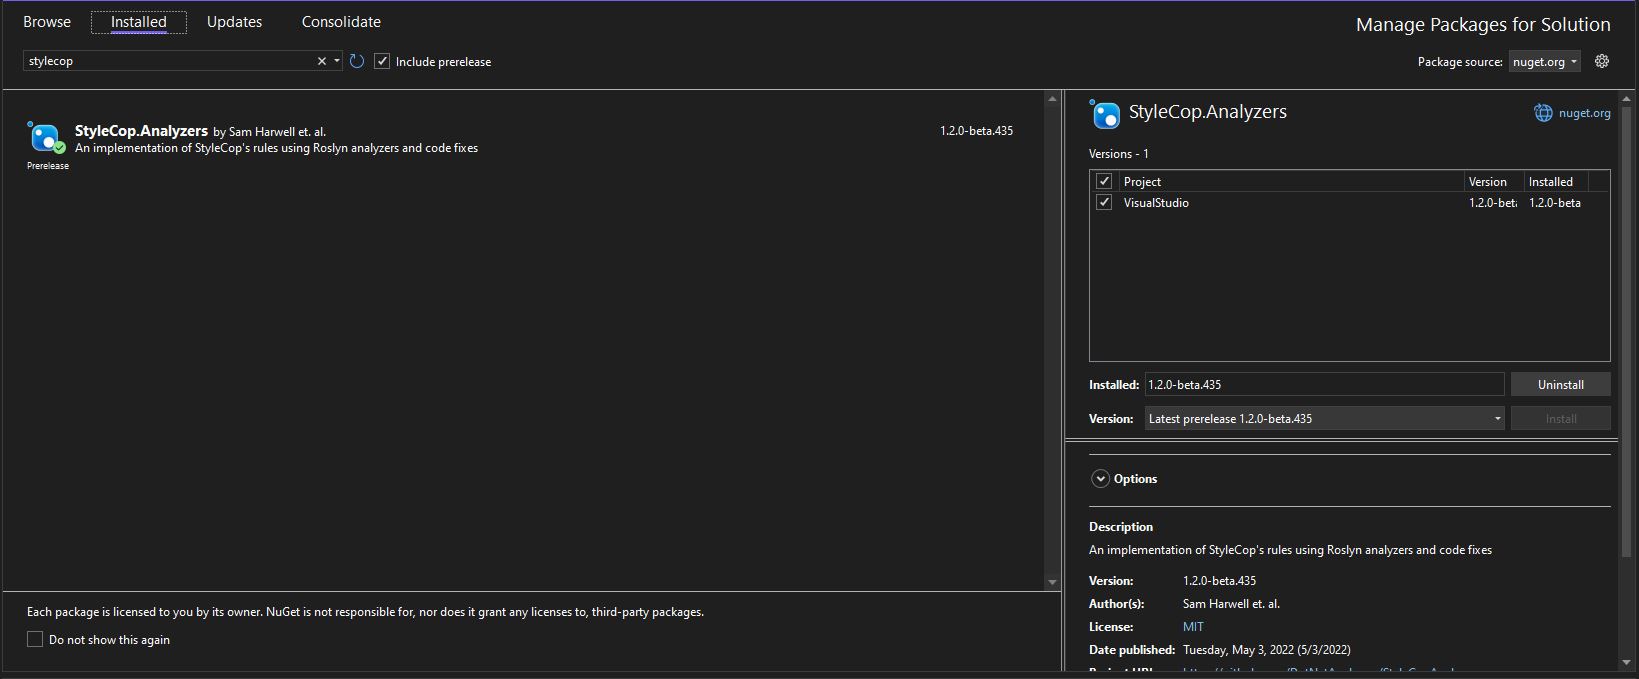
There will be a short wizard that you will navigate through to install. Afterward you can steer back to the Installed tab or Solution Explorer to verify that the package has been successfully installed. Below I show the installed package through the Installed tab of the Manage Packages for Solution window.
Dotnet CLI Tool
At last, we arrive at my final method, the dotnet CLI tool. This one is my favorite as I find it to be the easiest to use. From your favorite shell (I use PowerShell), run the following in the project directory:
PS> dotnet add package StyleCop.Analyzers --version 1.2.0-beta.435
Just like with the Package Manager Console, we will see some output.

And to verify that it installed, I just check the csproj file to see if there is a reference to the package. Here is my csproj file:
<Project Sdk="Microsoft.NET.Sdk">

  <PropertyGroup>
    <OutputType>Exe</OutputType>
    <TargetFramework>net7.0</TargetFramework>
    <ImplicitUsings>enable</ImplicitUsings>
    <Nullable>enable</Nullable>
  </PropertyGroup>

  <ItemGroup>
    <PackageReference Include="StyleCop.Analyzers" Version="1.2.0-beta.435">
      <IncludeAssets>runtime; build; native; contentfiles; analyzers; buildtransitive</IncludeAssets>
      <PrivateAssets>all</PrivateAssets>
    </PackageReference>
  </ItemGroup>

</Project>
Again, my favorite is the dotnet command line tool but I know it’s not for everyone. Luckily with Microsoft, they usually provide a few different ways to complete the same task such as the other two through Visual Studio. This is going to wrap it up for me, here is a link to the section of my blog repo with all of my test code from this post if you need to refer to it.